aNewDomain.net — I’ve been blogging and running pro journalism websites for years now. When it comes to doing the heavy work — regardless of the CMS I am saddled with — I prefer to use Windows Live Writer as a first line of attack. But I bet you didn’t know it’s possible also to use Microsoft Word to publish to blogs. That’s been possible since 2007 and now, with the more-powerful blogging features in Word 2013, it’s even easier to do. Here’s how to use Word 2013 to publish to blogs — made easy.
One thing to note: Word 2013 is preinstalled on the Microsoft Surface 2 and Surface RT tablets. So if you have one of those tablets, blogging on the go is fairly convenient. And at work, this allows you to have Word open and appear to be working on something else while you’re actually posting to your site.
How to use Word 2013 to publish to blogs
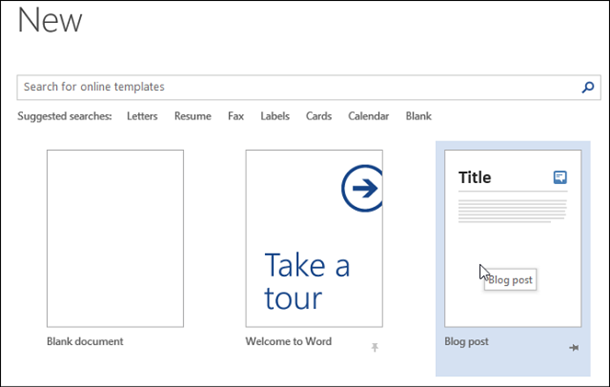
To start blogging from Word go to File > New.
If you’re an experienced writer, you can probably get going with a blank document. Or select a template to get you going.
If fact, one of the templates you’ll see at the top is for a blog post. If you don’t like the templates on display, just search online for even more.
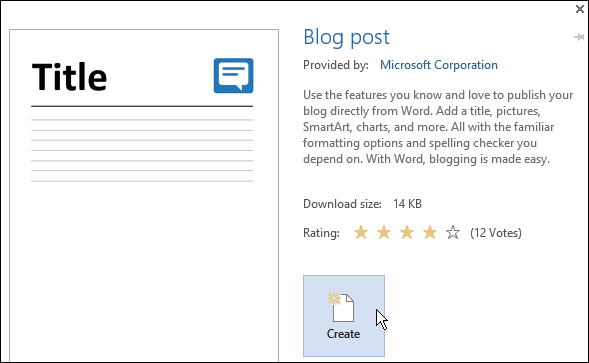
For this tutorial I am going to use the basic blog post template. After selecting the template — click Create.
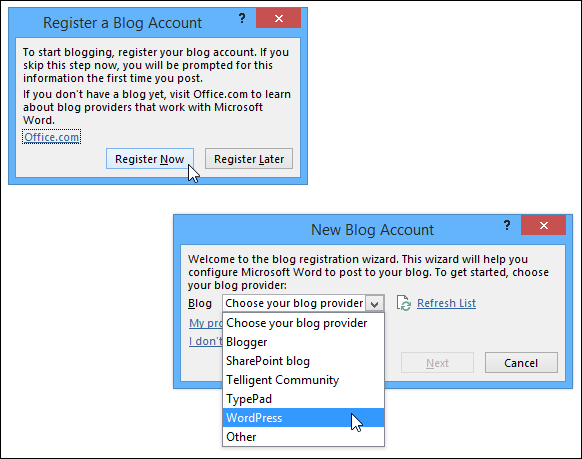
Next you’ll get a setup wizard that allows you to get your blog registered with Word by selecting your provider. If you don’t have a provider set up yet, you can set one up from scratch from one of the offered providers.
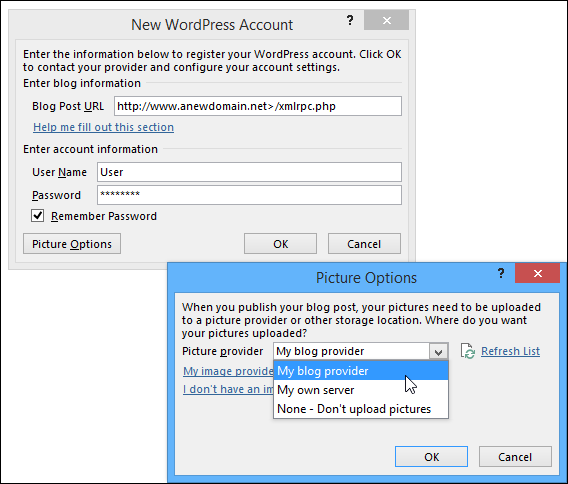
Type in your blog’s URL, username and password and select your picture options. I also recommend checking the box to Remember Password so you don’t have to type it in all the time.
After you have everything set up correctly you can start your first post. If you’re new to Word 2013, you’ll actually find the interface and controls intuitive for creating a quality blog post.
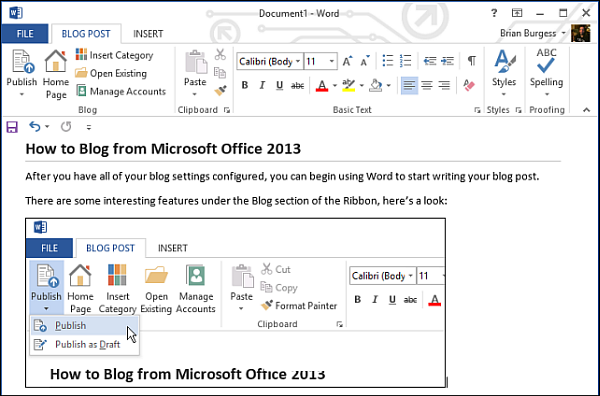
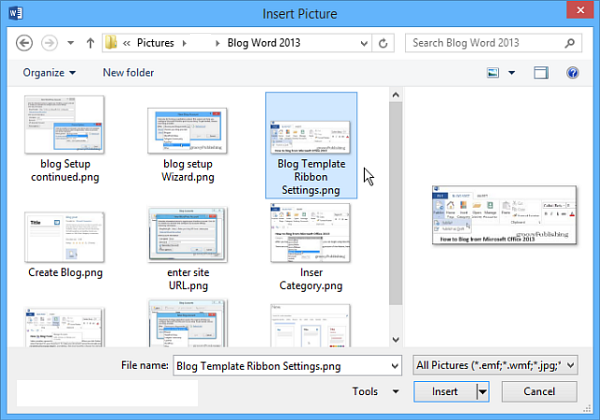
For example, adding images, video and other media is a snap. Just go to Insert > Pictures from the Ribbon, and select the photo or image you want to use or you can just drag and drop it into the post as well.
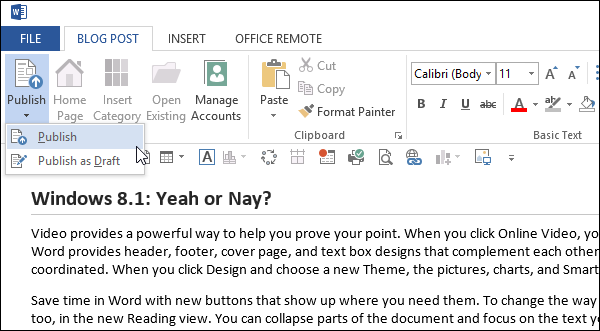
When your post is complete and you’re ready to publish it, go to the Blog Post tab and click the Publish button. Or if you want to tweak it in your CMS system such as WordPress, then publish it as a draft.
If you’ve used Windows Live Writer, which is my blogging tool of choice, you’ll find the Ribbon easy to use for creating your blog posts. Actually, Word 2013 does have more options and powerful features compared to other blogging clients.
For aNewDomain.net, I’m Brian Burgess.
Based in Pelican Rapids, MN, Brian Burgess led the relaunch of BYTE with Gina Smith, co-founded aNewDomain.net with Gina, John C. Dvorak and Jerry Pournelle in 2011, and serves as the editor-in-chief of GroovyPost.com. He is the How To gallery captain here at aNewDomain.net. Email him at Brian@aNewDomain.net or Brian@Groovypost.com and find him on Google + and on Twitter as @mysticgeek.


Great piece, Brian.
Thank you for the post. any ideas on how to use it with Tumblr?
I’m having the same issue